Announce It Lite for Jira (Data Center)
Overview
Announce It Lite for Jira is a simple yet powerful application designed to display important announcements on Jira Data Center and Jira Service Management instances. It allows administrators to configure banners that appear across the application with customizable content, visibility levels, and severity types.
With Announce It Lite for Jira, you can easily communicate critical information to users, whether it's a system update, an important notice, or a friendly reminder.
Features
Visibility Level
Choose who can see the announcement:
Public: The announcement will be visible to everyone, including non-logged-in users.
Private: Only users who are logged into the system will be able to see the announcement.
Disabled: The announcement will not be shown to anyone.
Severity Levels
Define the type and priority of the announcement. Based on the severity level selected, the banner will display different colors and icons:
Info
 : General information.
Warning
 : A cautionary or advisory message.
Error
 : A critical issue that requires attention.
Success
 : A confirmation or positive notification, such as successful actions or processes.
Announcement Content
Customize your message content using Wiki syntax. This allows for flexible formatting options such as bold text, links, bullet points, and more.
Start and End Date
Schedule announcements by defining a start and end date. The banner will only be shown during the selected timeframe.
How to Use
Accessing the Application Configuration
Navigate to the configuration page of the "Announce It Lite for Jira" application from the Manage Apps page.
Configuring the Announcement
Visibility Level: Choose between Public, Private, or Disabled. Public announcements will be seen by anyone who visits the Jira instance, while Private announcements are restricted to logged-in users. If the announcement is set to Disabled, it will not be displayed.
Severity Level: Select the appropriate severity level for your message. This selection affects the color and icon of the announcement:
Info
 :Used for non-urgent messages.
Warning
 : Highlights cautionary information or alerts.
Error
 : Indicates something critical that requires immediate attention.
Success
 : Displays messages of achievement or confirmation.
Message Content: Enter the message you want to display. Wiki syntax is supported, so you can include formatting such as:
*bold text*for bold text_[italic text]_for italics[Link text|URL]for hyperlinks* Bullet pointsfor lists
Start and End Date: Specify the dates when the announcement should be active. The banner will only appear between these dates. You can leave these fields empty if you want the announcement to display immediately and indefinitely.
Saving the Announcement
Once the fields are filled out, click on the Save button to publish your announcement.
Example Use Cases
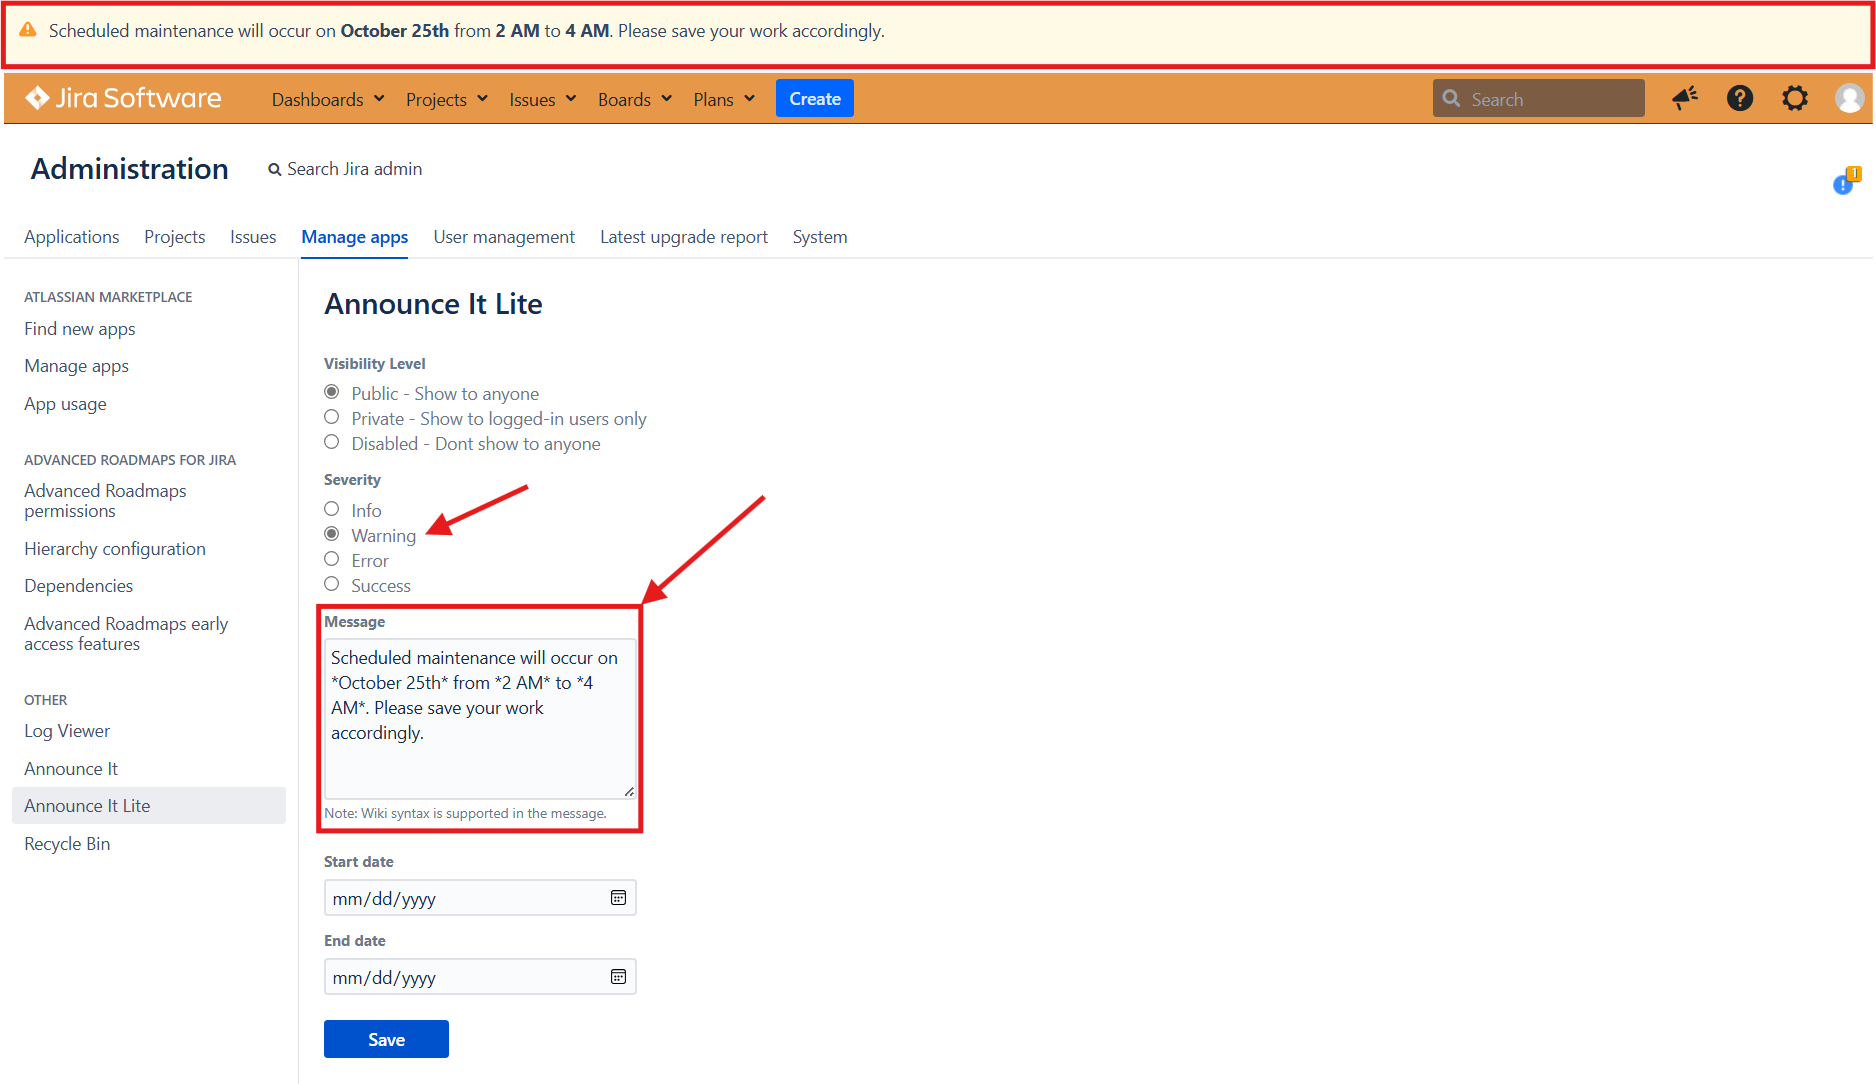
System Maintenance Notification
Use the Warning severity to notify users of scheduled system maintenance.
Example message:
Warning: "Scheduled maintenance will occur on October 25th from 2 AM to 4 AM. Please save your work accordingly."

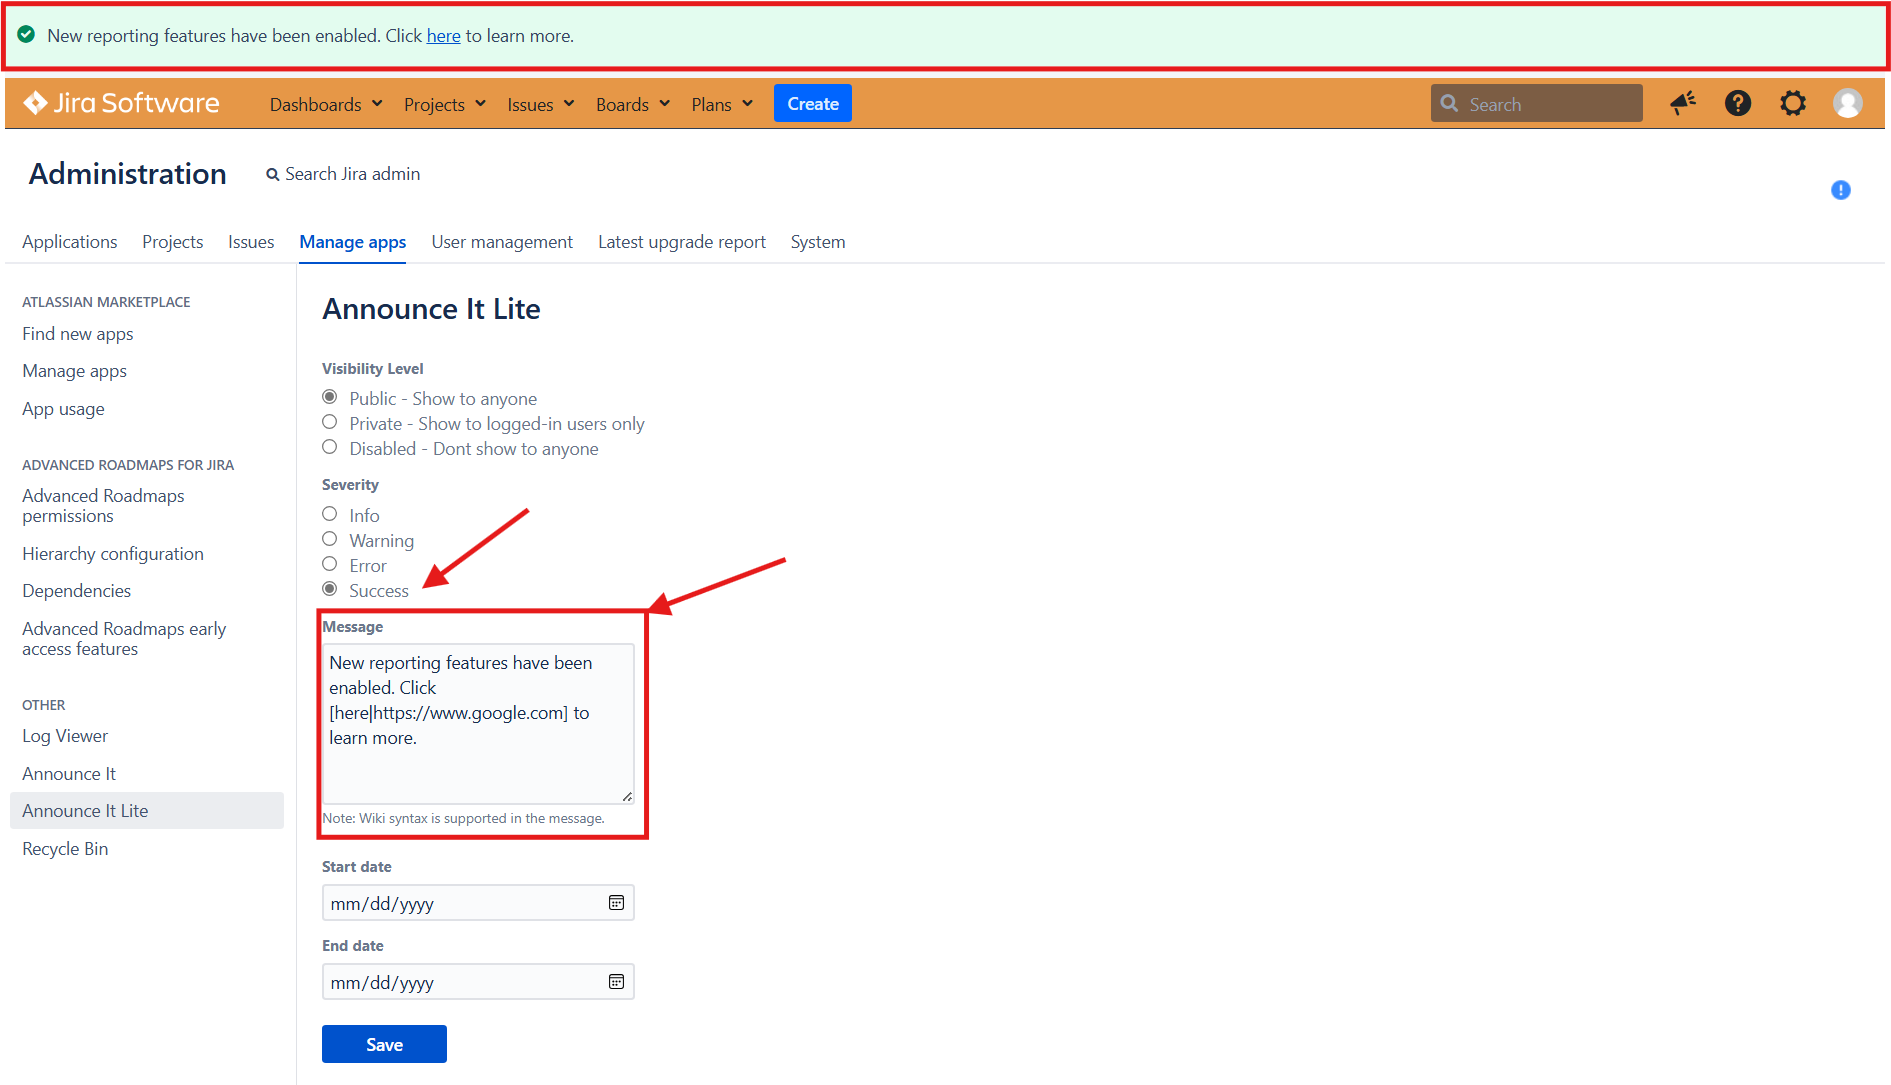
New Feature Announcement
Use the Info or Success severity to introduce new features or capabilities.
Example message:
Success: "New reporting features have been enabled. Click here to learn more."

Best Practices
Use the Start Date and End Date options to automatically manage the visibility of time-sensitive announcements.
Be sure to select the appropriate Severity Level to ensure users understand the urgency of your message.
When using Wiki syntax, preview your message to ensure it appears as expected, especially if you are including formatted content or links.
Keep messages concise and to the point, focusing on the most important information.
Check out extra features of Announce It for Jira
Preview announcement before publishing
Configure announcement type not only the severity. Available types:
Banner
Flag
Overlay
Publishing multiple announcements at the same time
Track announcement acknowledgement by users per announcement
Keep announcements saved and re-enable later when needed
Control visibility based on specific project(s), specific project category(s), specific project role(s), specific user(s), specific user group(s)
Duplicate announcement with just a click
Clean user interface of the configuration page.
Feel free to check out Announce It for Jira.
