
Dynamic UI for Jira
Overview
Dynamic UI for Jira is the ultimate tool to elevate your Issue Views with rich, comprehensive, and valuable additional data. This app empowers you to create a wide range of custom fields and seamlessly organize them into fully configurable field panels. With these capabilities, you can enhance the structure and layout of values and fields within your Issue Views like never before.
The app includes special custom field and panel types designed to unlock advanced integration possibilities. By leveraging Velocity Scripting or Groovy Script within dedicated panels, you can achieve complex data renderings and much more.
For a detailed overview of all dynamic custom field types available in the app, please refer to our dedicated guide here.
Dynamic UI for Jira introduces two main concepts.
A range of calculated or editable custom field types to be used with your workflow
A few custom panel types that can be used to either implement custom templates and complex renderings or to display configurable panels of (custom) fields inside your Jira view.
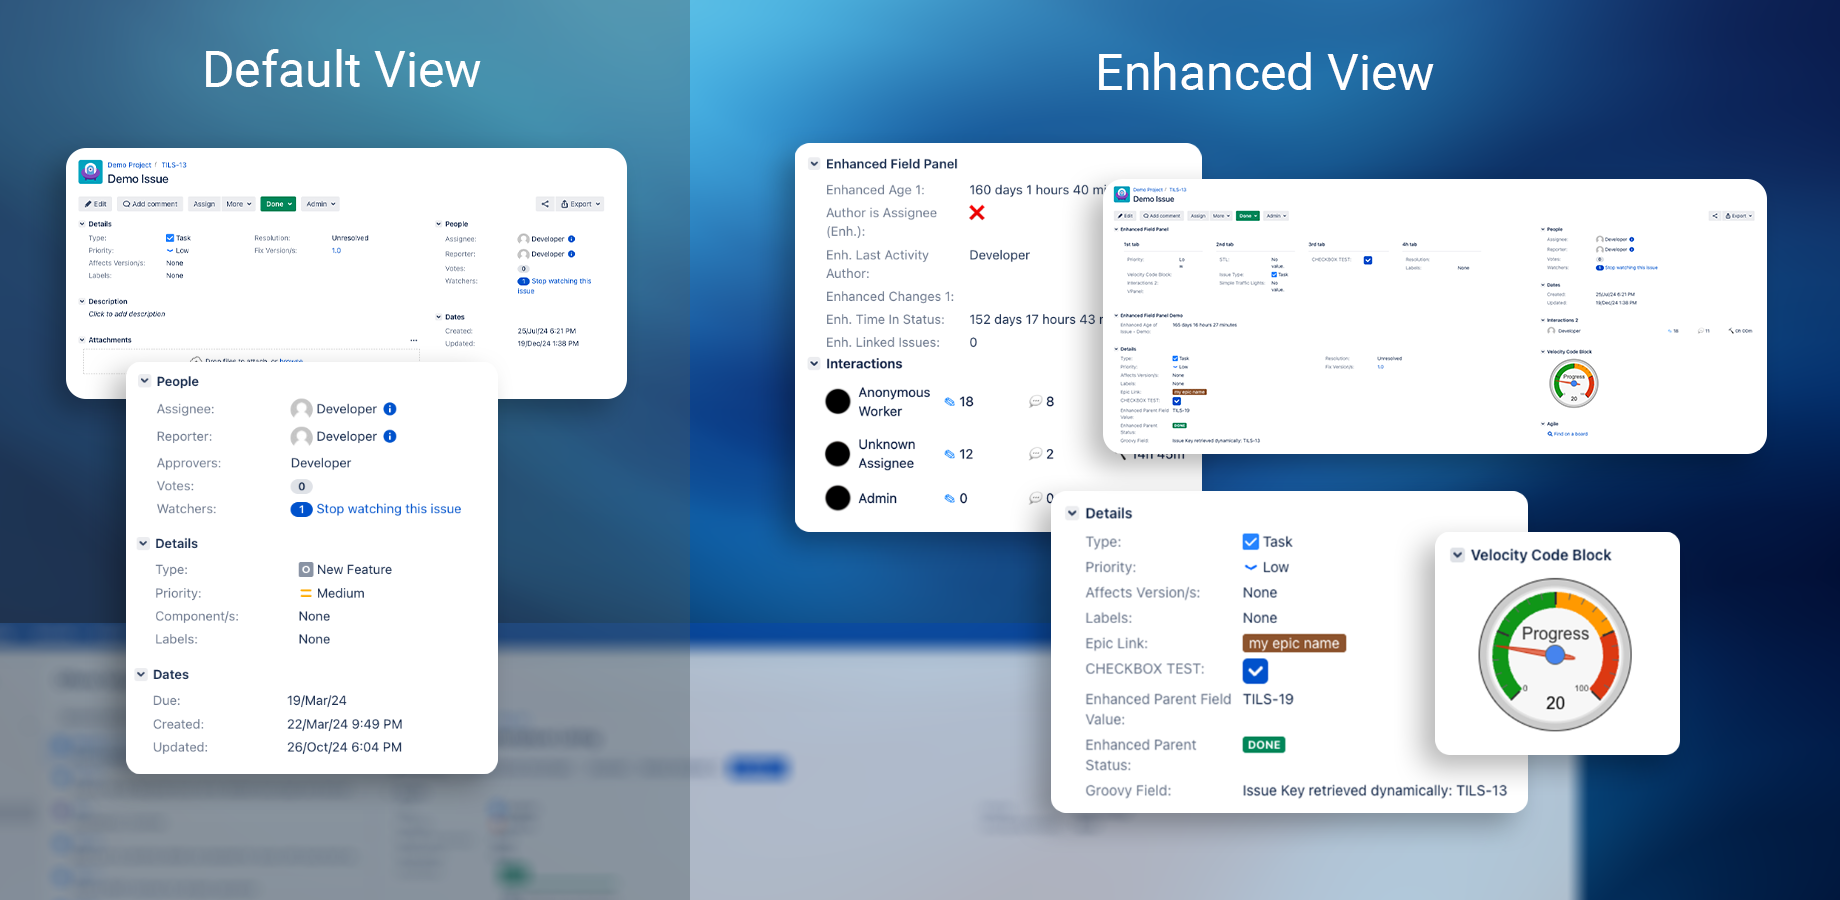
Comparison of default and dynamic fields and panels
Calculated Custom Fields
These custom fields display calculated values that derive from Jira’s architectural concepts. The fields can be used to display linked issues, change-count on the issue or others. See “Dynamic UI Field Types” for detailed description.
Editable Custom Fields
These fields can be edited by the user and will display the input value. Examples of this would be the Traffic Light field, Issue or Group Picker fields or Single Checkbox. These Fields can be edited directly from the view and will render and update accordingly.
Editable Custom Field Panels
Making use of the custom field context provider, Dynamic for Jira offers creation and usage of your own field panels that can be configured with any desired fields and placed inside the view where they are needed. These types are listed among the other custom field types but are actually adding up to a larger point of view. You can add these as a container to group and display any fields anywhere inside the view.
A very special feature is brought to Jira by utilizing the Dynamic Velocity Panel. This enables users to implement the Velocity templating engine in order to place more complex renderings than those that are possible from other fields.
Key Features
Custom Field Types: A wide range of custom field types that go beyond Jira's default options.
Custom Panels: Use Velocity- or field-panels to create tailored sections in your desired view.
Flexible Configuration: Fields can be easily configured for use across various screens in Jira.
User-Friendly Interface: Intuitive UI for administrators to manage field settings.
Seamless Integration: Works seamlessly with Jira Data Center environments.
Performance Optimized: Designed to perform efficiently even in large-scale environments.
Installation Guide
Follow these steps to install Dynamic UI for Jira on your Jira Data Center instance:
Download the App:
Visit the Atlassian Marketplace and search for "Dynamic UI"
Download the app or copy the license key for evaluation or purchase.
Install the App:
Log in to your Jira instance as an administrator.
Navigate to Administration > Manage Apps > Find new apps.
Upload the app file or search for "Dynamic UI for Jira" and install it directly.
License Configuration:
Navigate to Administration > Manage Apps > Dynamic for Jira.
Paste your license key and activate it.
Verify Installation:
Ensure the app is listed under "User Installed Apps" and confirm it is enabled.
User Guide
Adding a Dynamic UI Field
Navigate to Administration > Issues > Custom Fields.
Click Add Custom Field.
Select one of the Dynamic Field types from the list.
Provide a name and description for the field.
Configure additional settings specific to the selected field type.
Associate the field with relevant screens.
Save your changes.
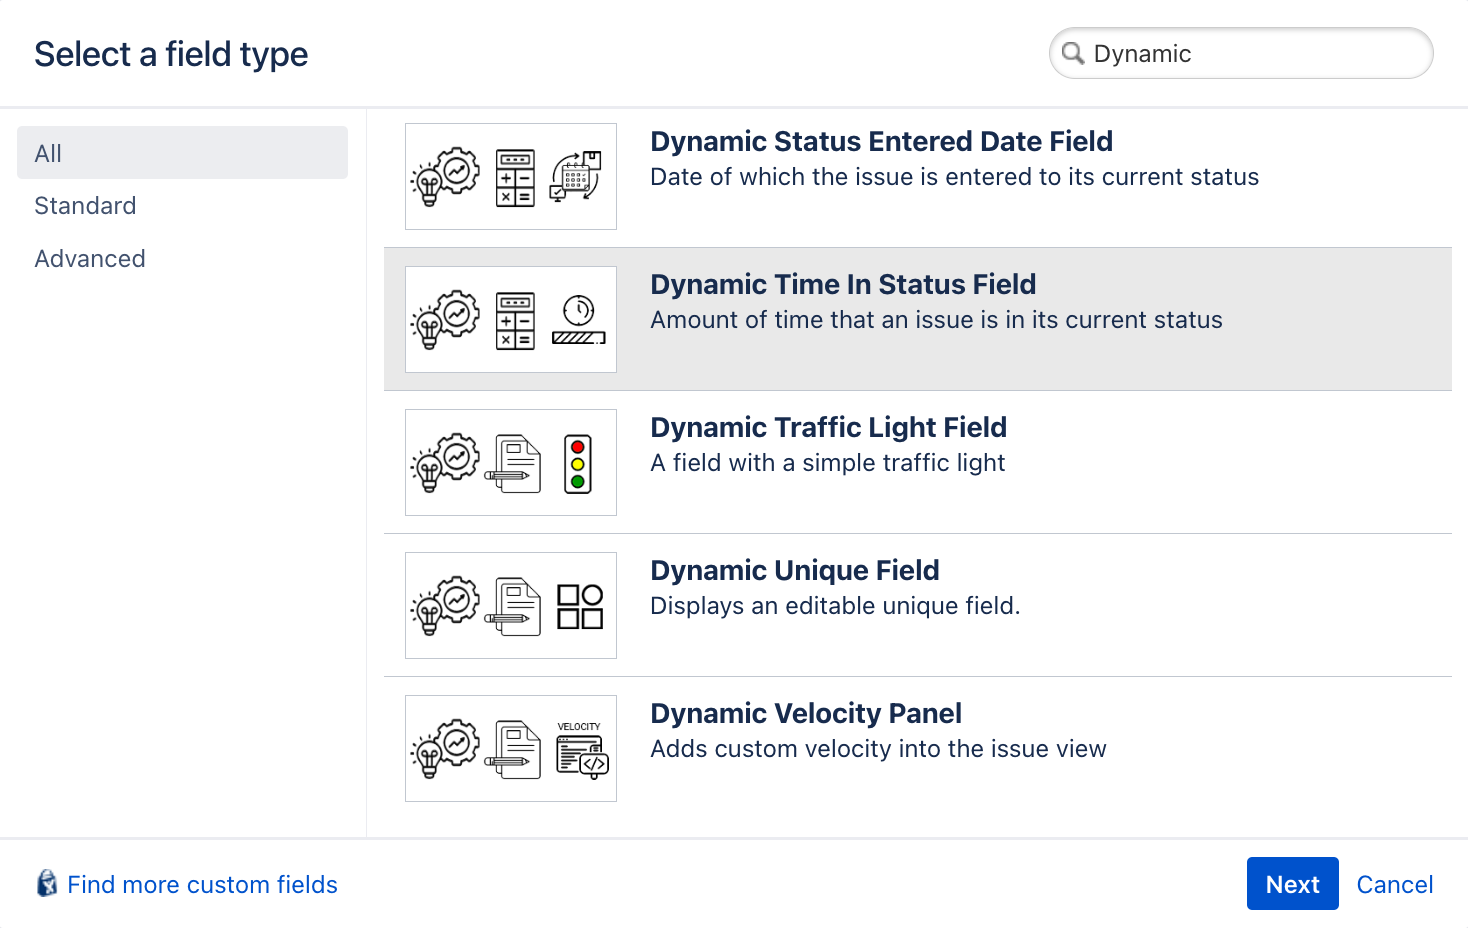
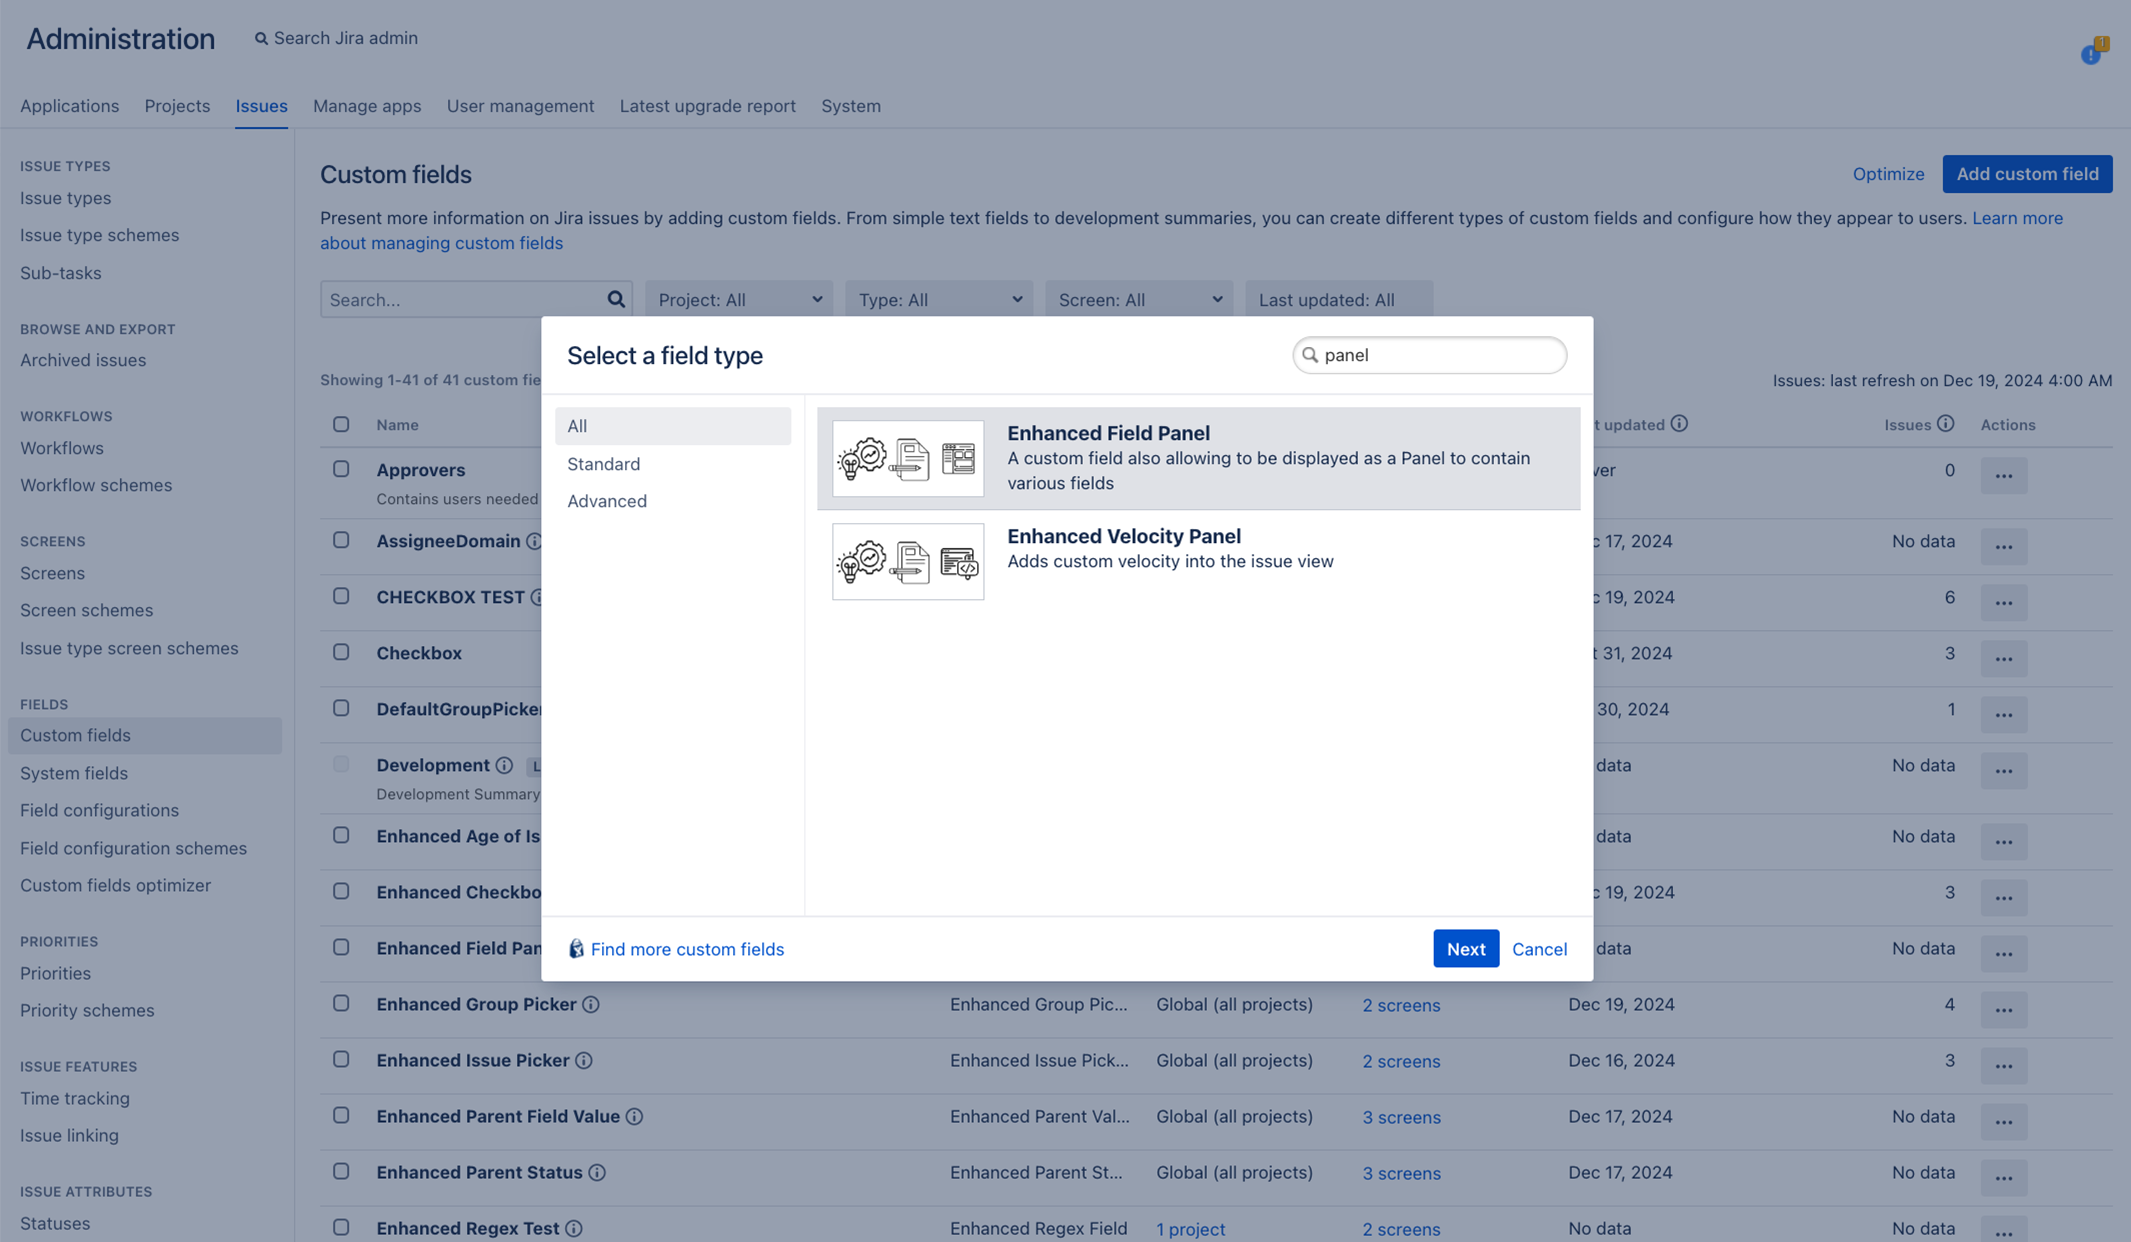
Select custom field type
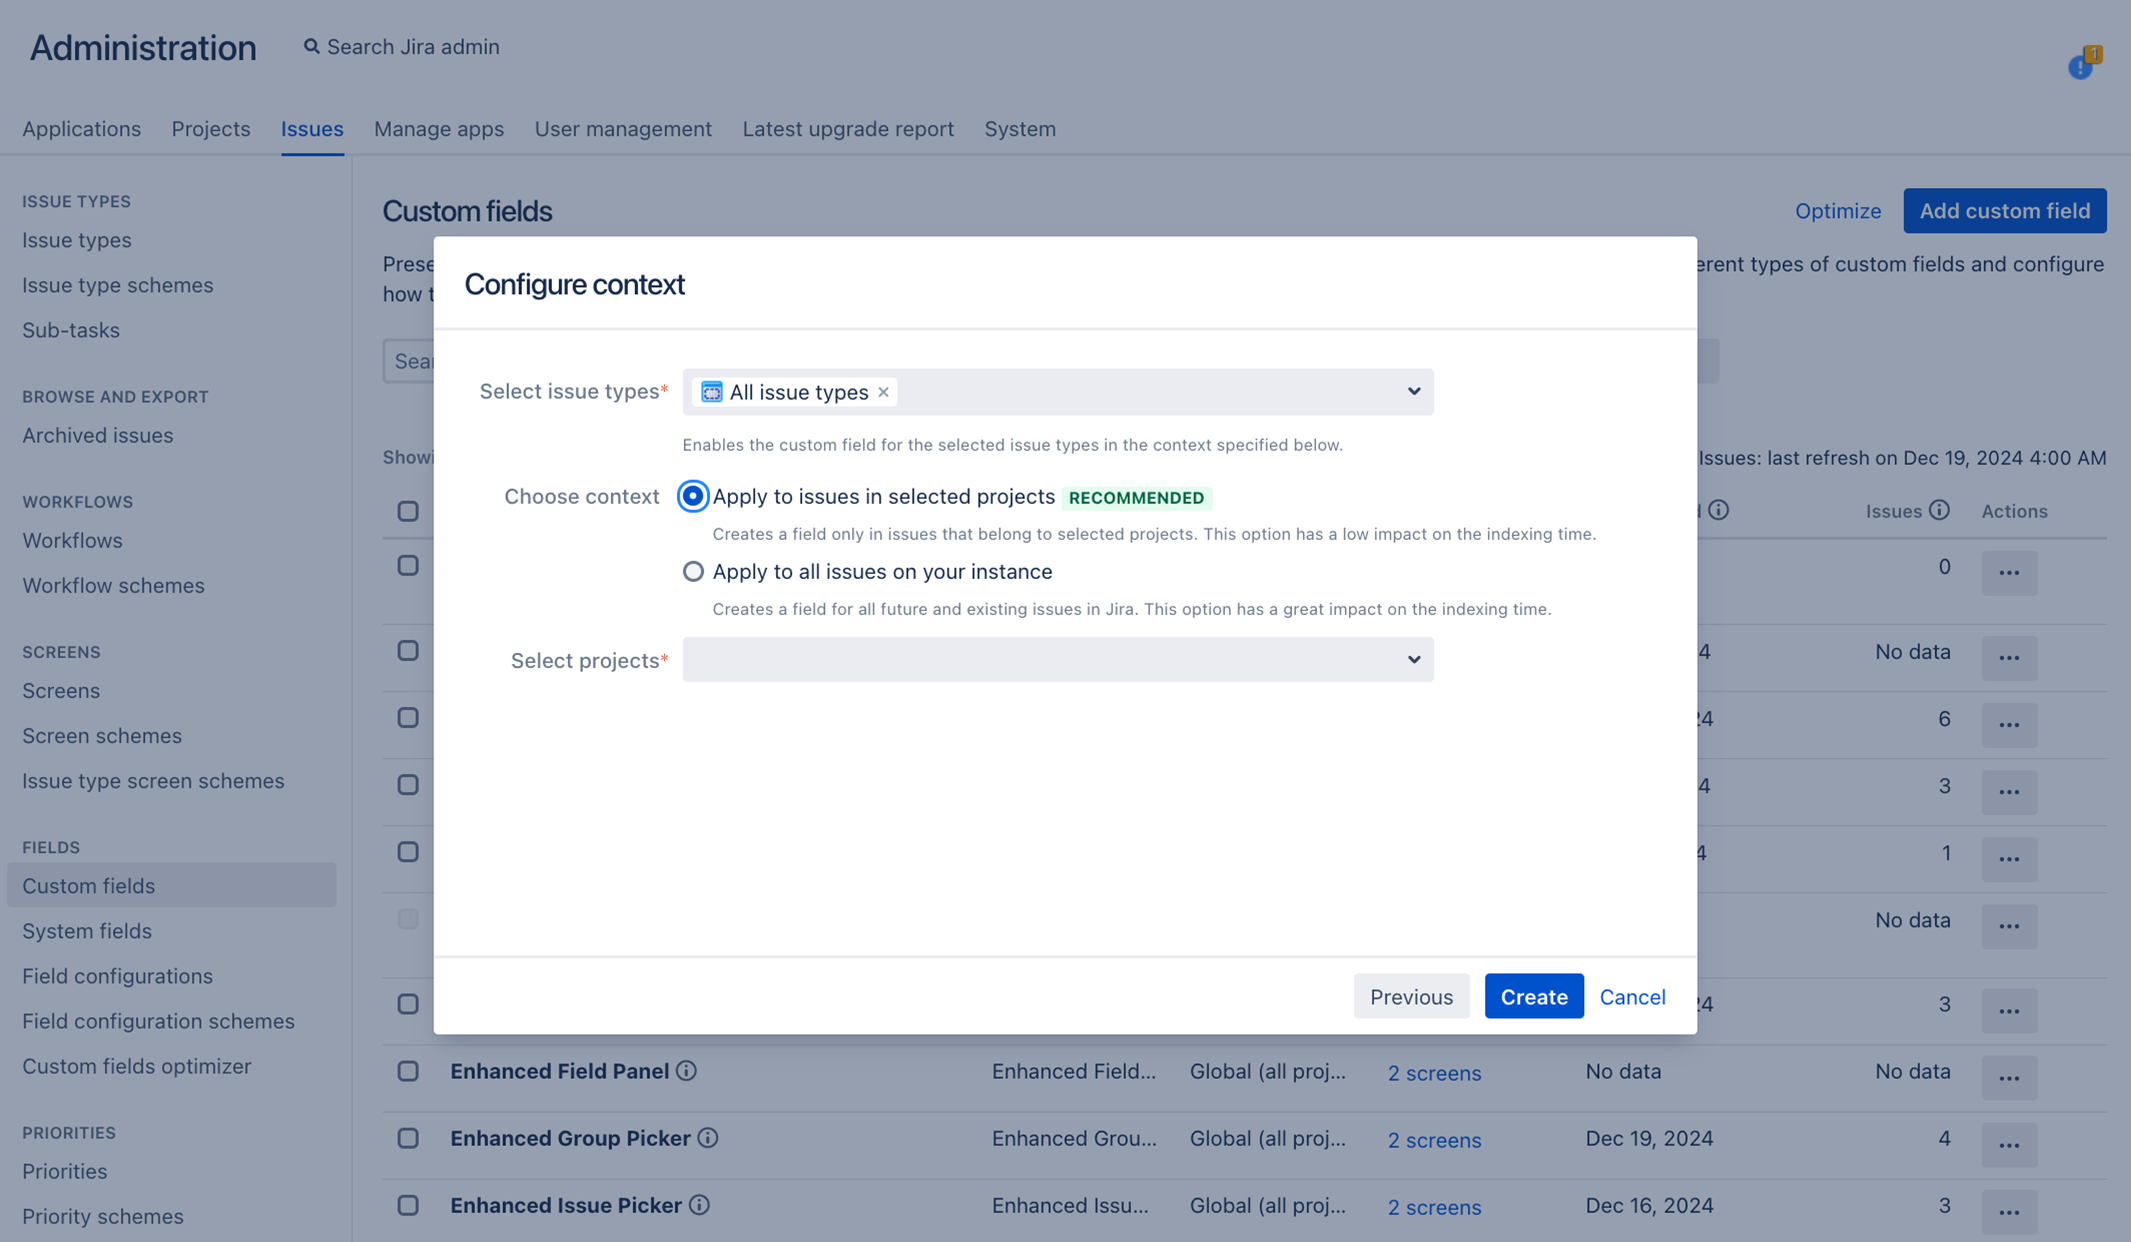
Configure contexts
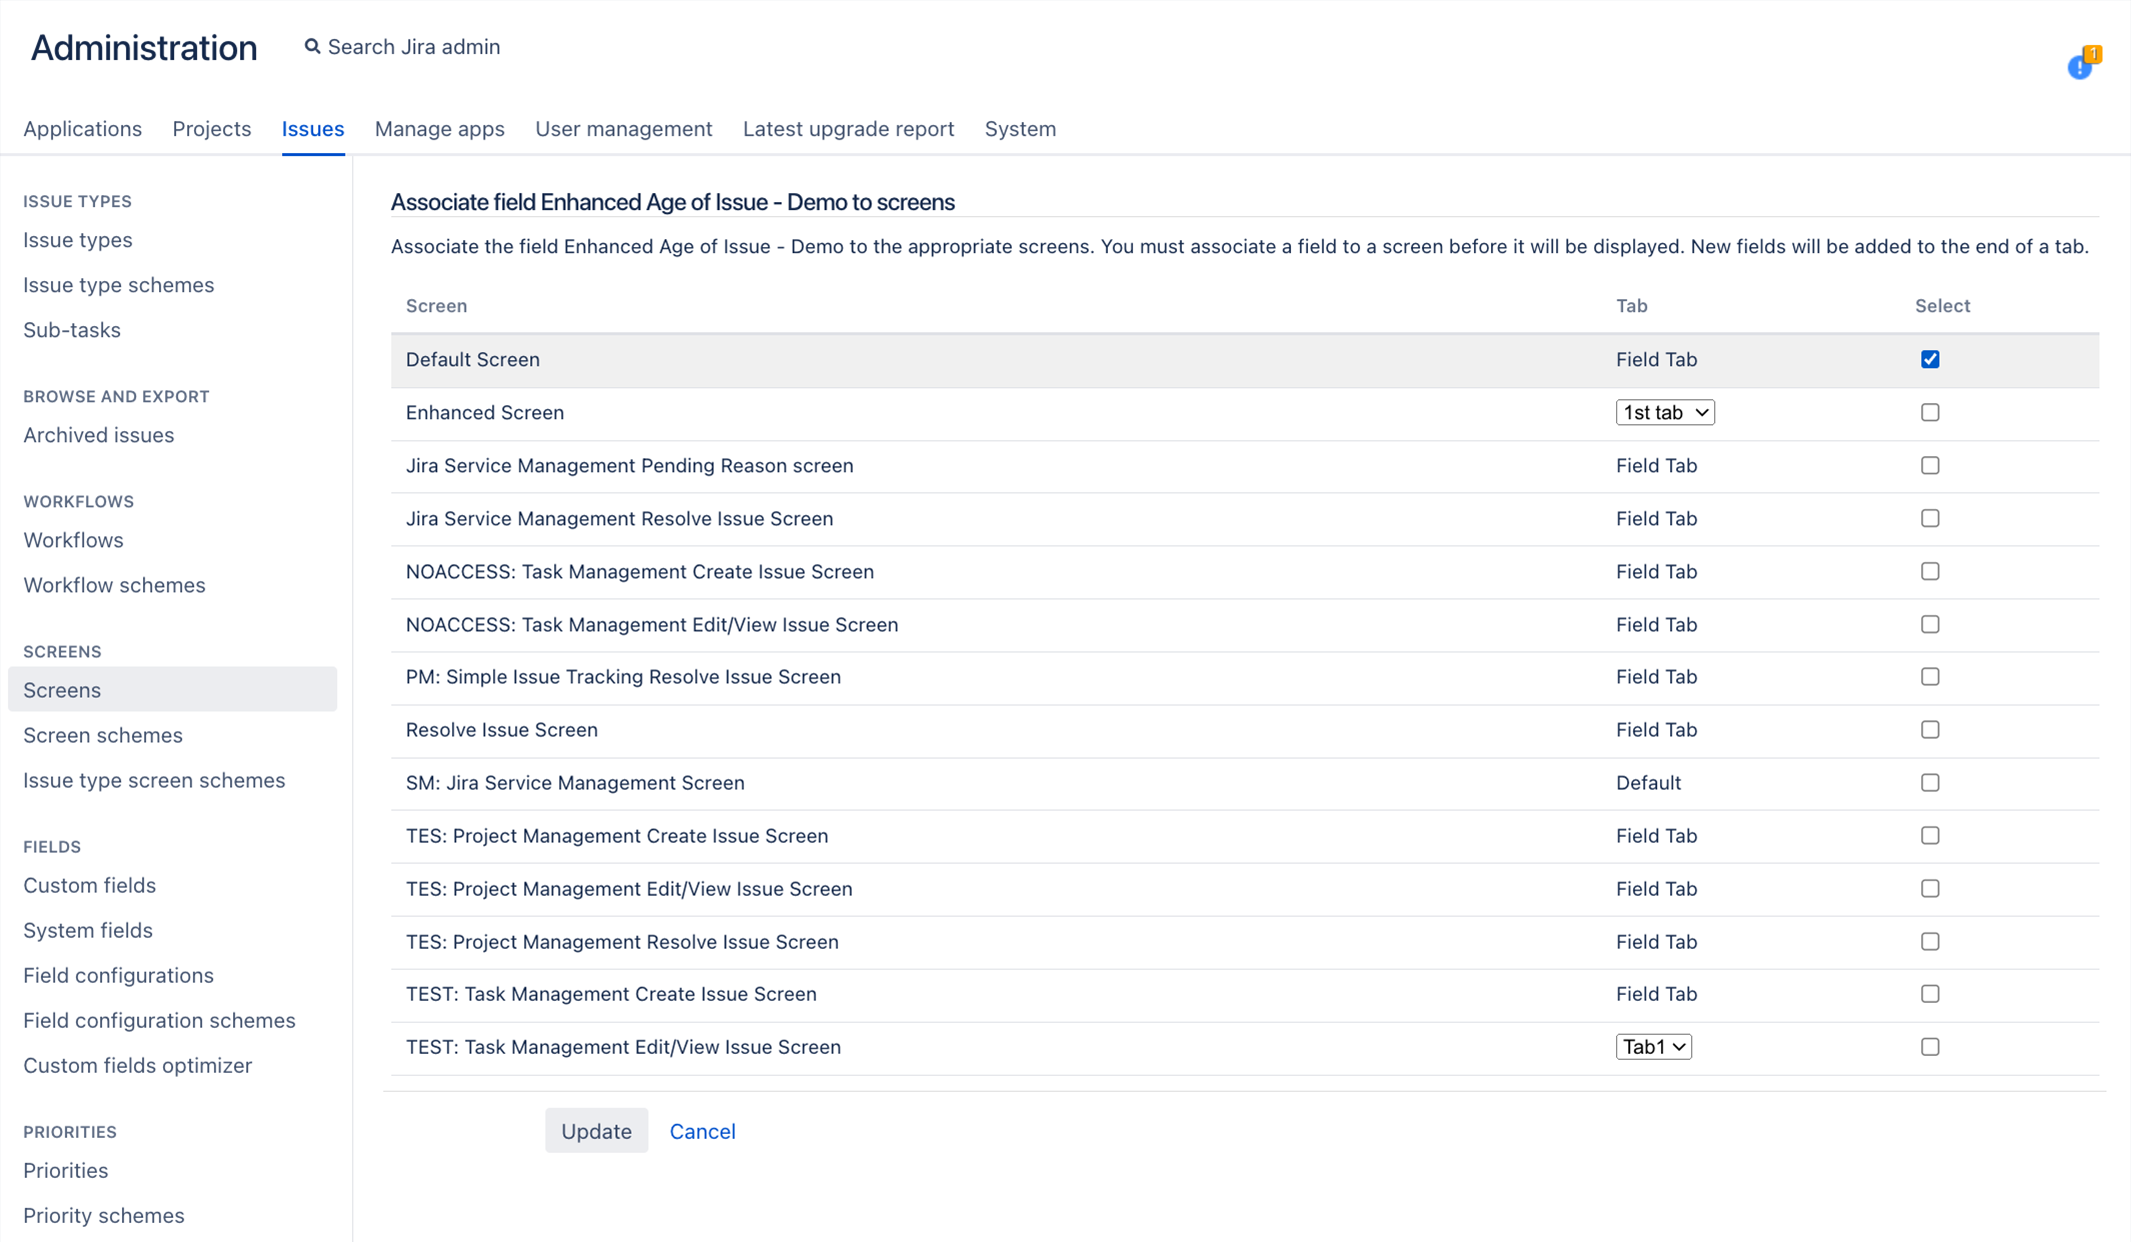
Associate Field to Screen
Configuring Dynamic UI Fields
Each field type offers unique configuration options, such as:
Default Values: Set default values to streamline data entry.
Dynamic Behaviors: Create conditions to show or hide fields based on other inputs.
Styling Options: Customize the appearance of fields.
Refer to the "Field Types" section for detailed instructions on configuring each type.
Configuring Dynamic UI Field Panels
Adding a Dynamic UI Field Panel
Navigate to Administration > Issues > Custom Fields.
Click Add Custom Field.
Select one of the Dynamic Field Panel types from the list.
Provide a name and description for the panel.
Save your changes.
Select dynamic custom field panel type
Configuring Dynamic UI Field Panels
Navigate to Administration > Issues > Screens > Screens.
Click Add Screen.
Provide a name and description for the screen.
Add your desired fields to the screen.
Go Back to Administration > Issues > Custom Fields.
Select the previously created field for the panel and click “configure contexts”.
Add the previously created screen to display the fields inside the panel.
Configure the location of display on the UI and save your changes.
Access the desired View to verify display of the panel.
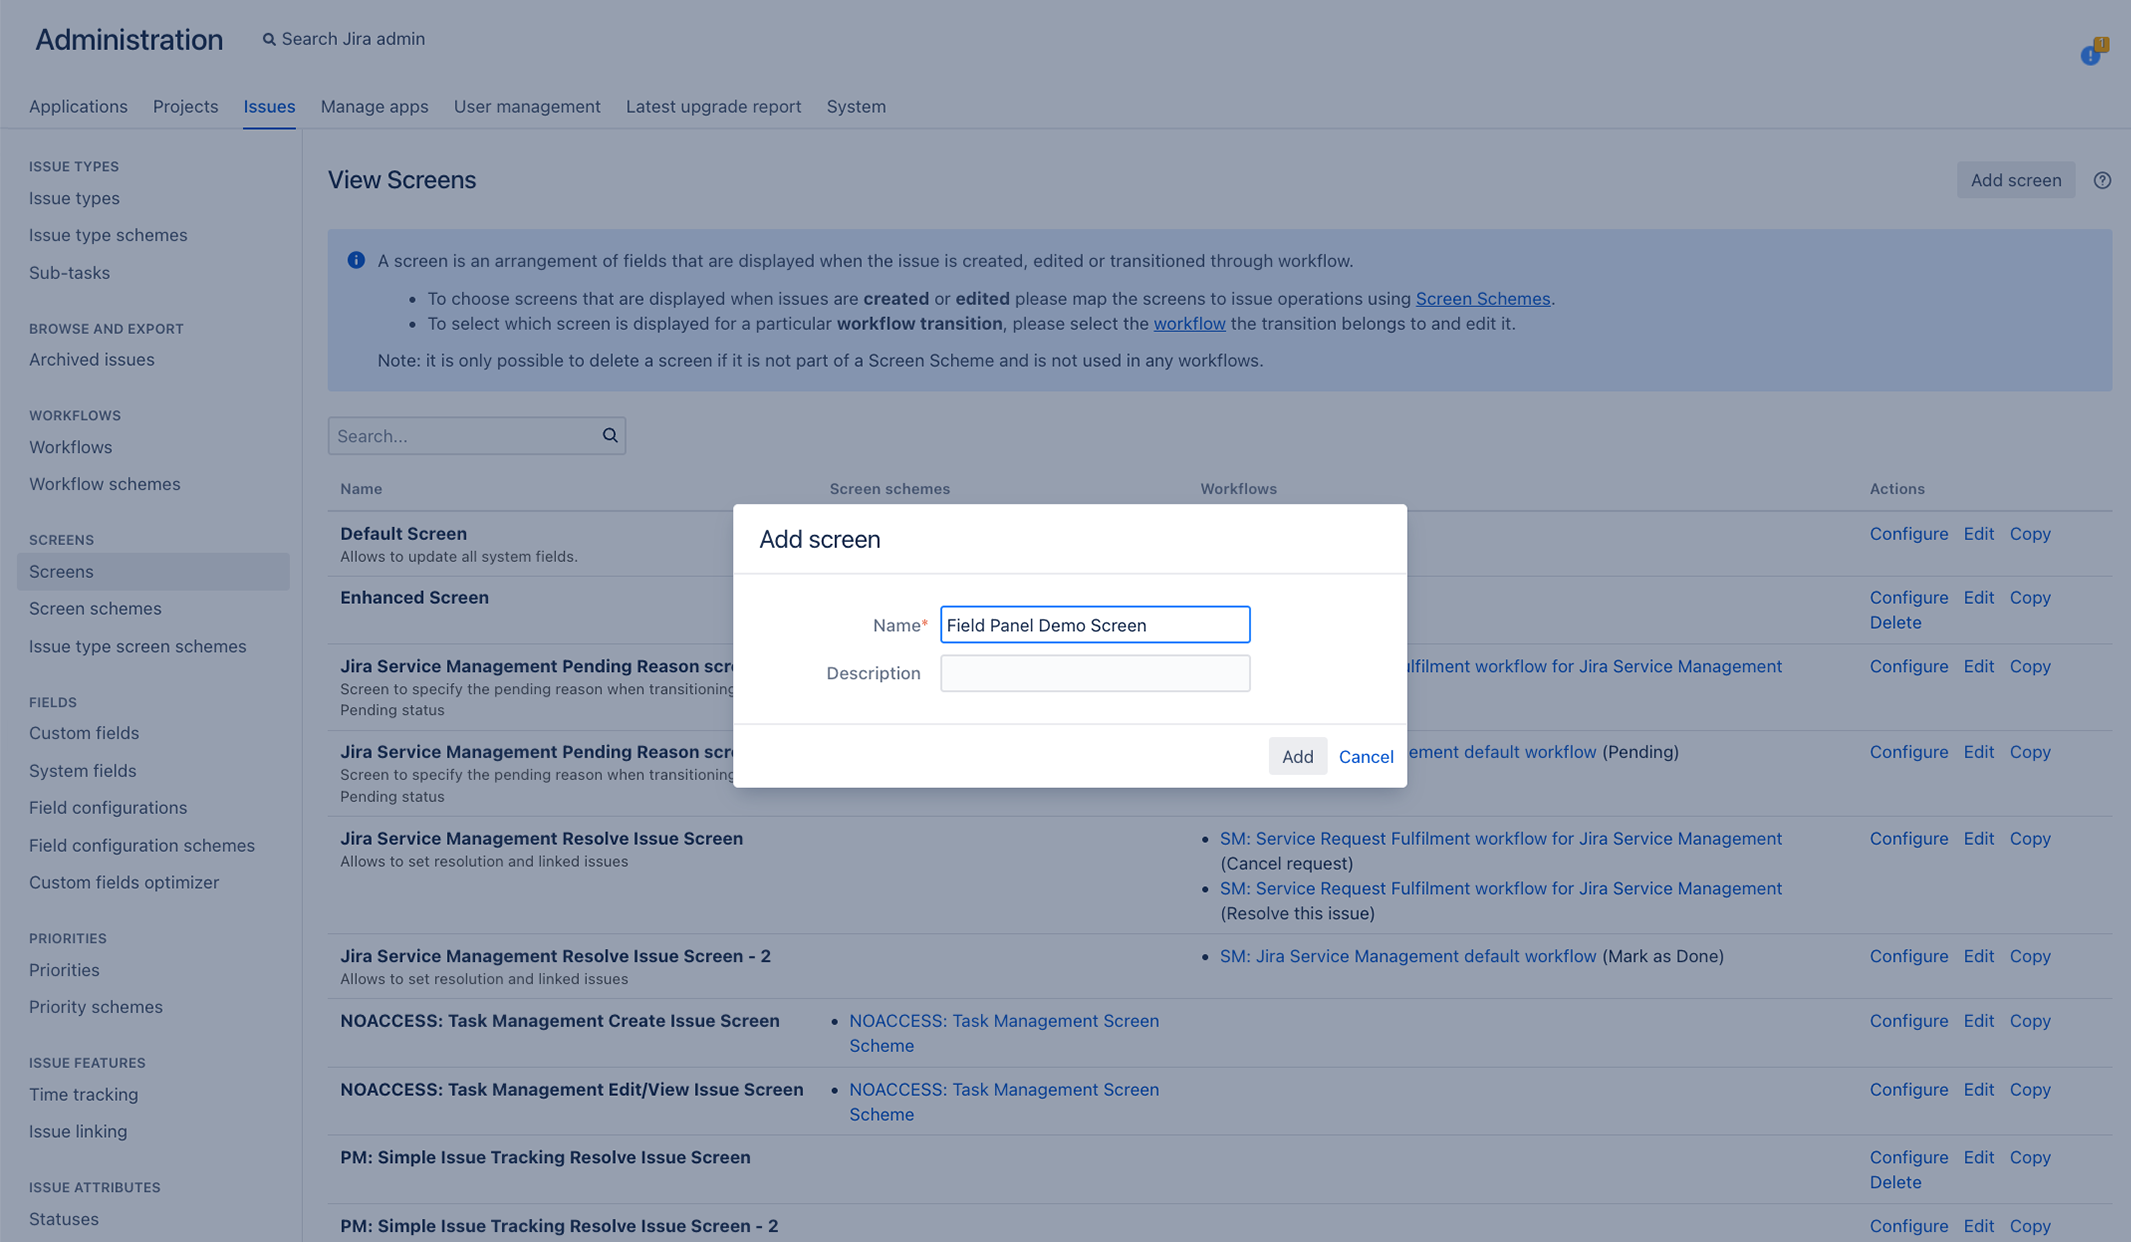
Create a new screen for the field panel
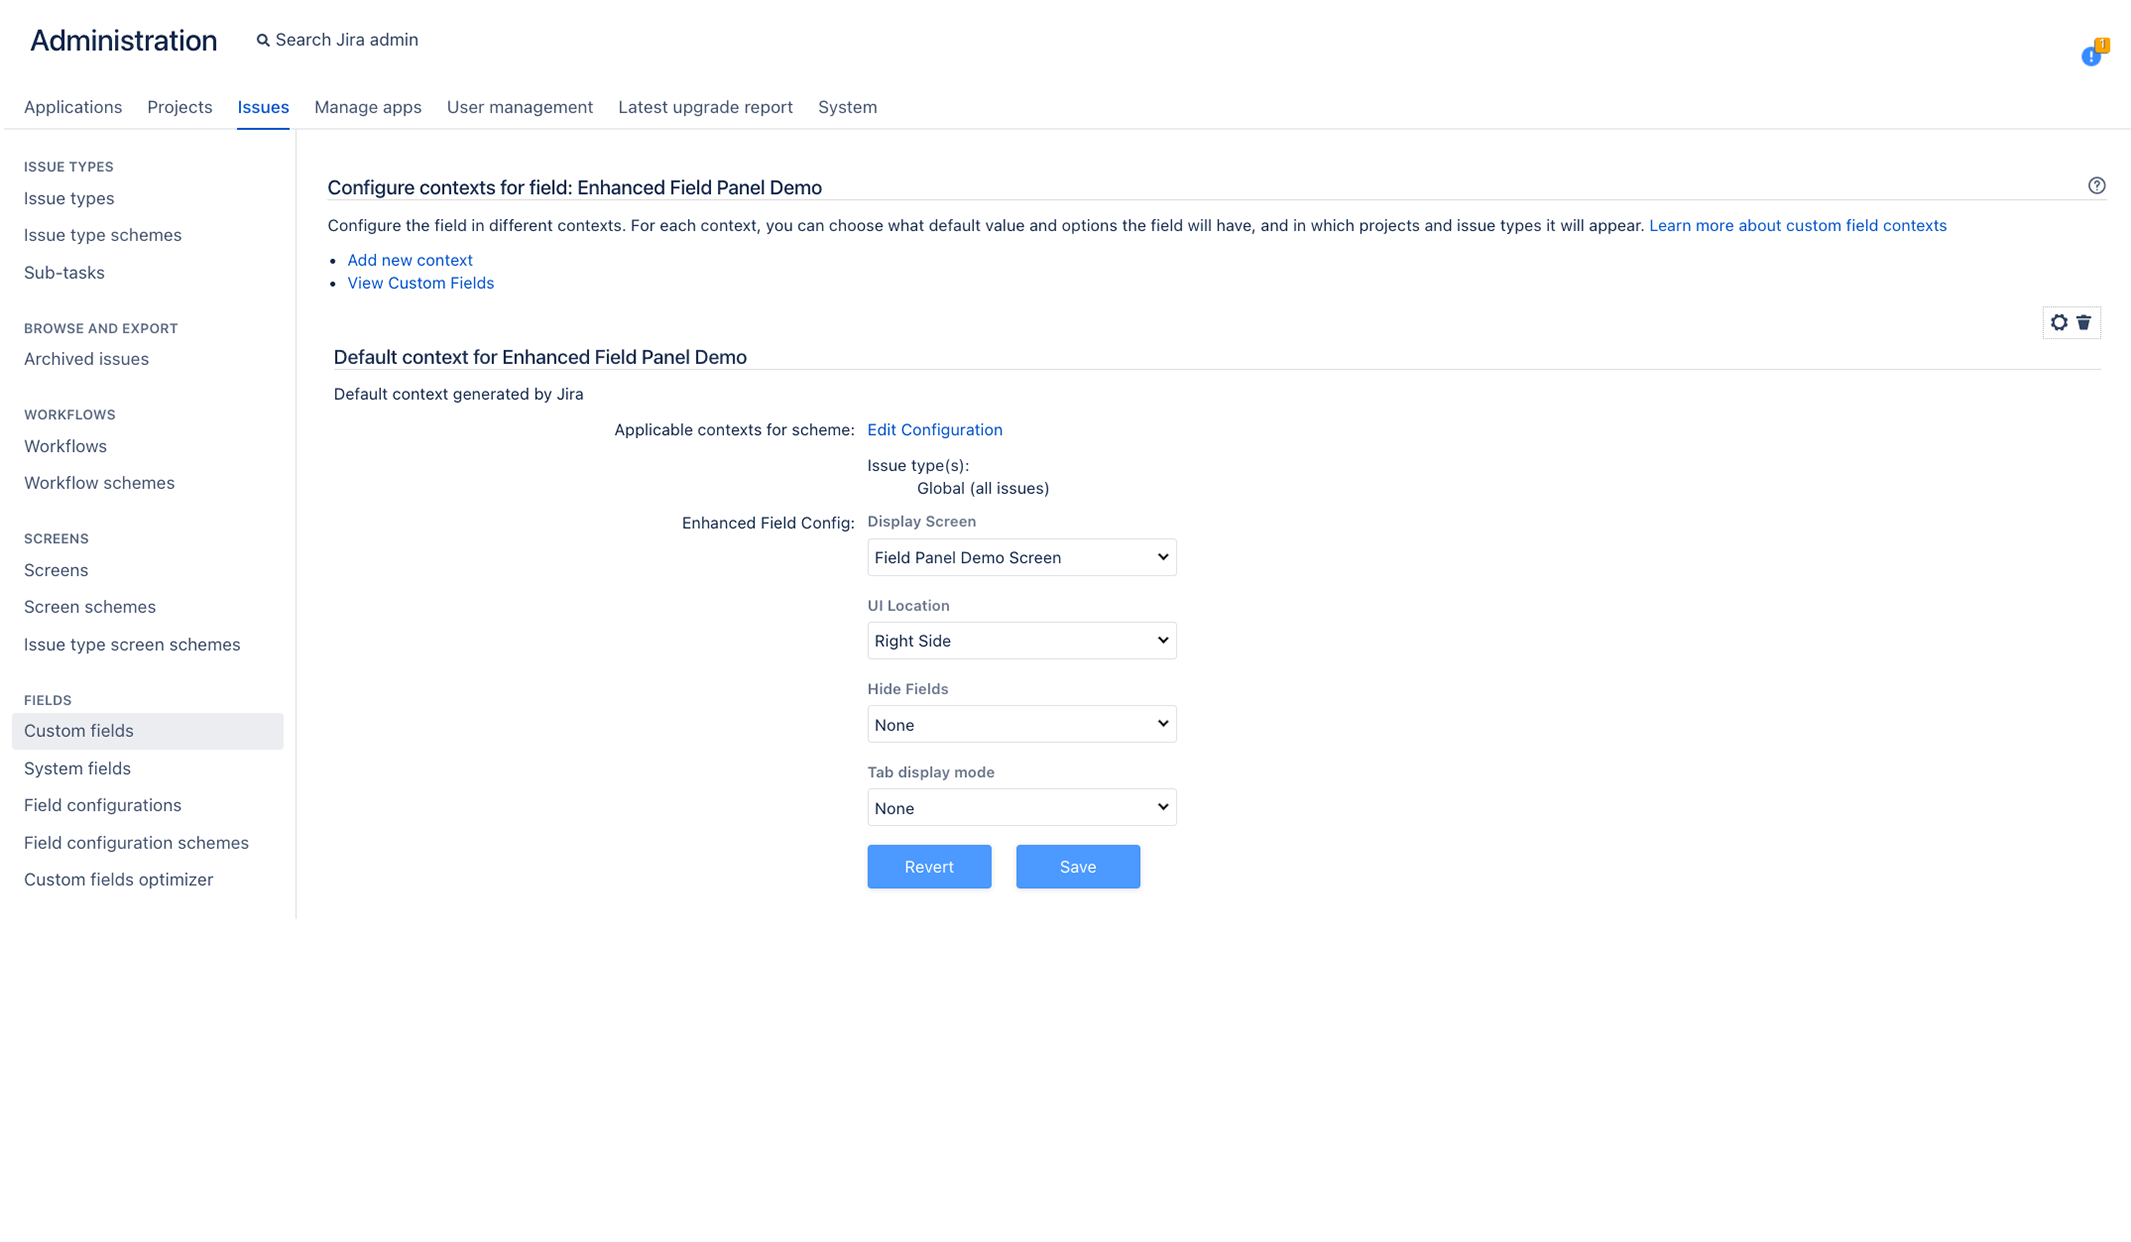
Add screen to panel
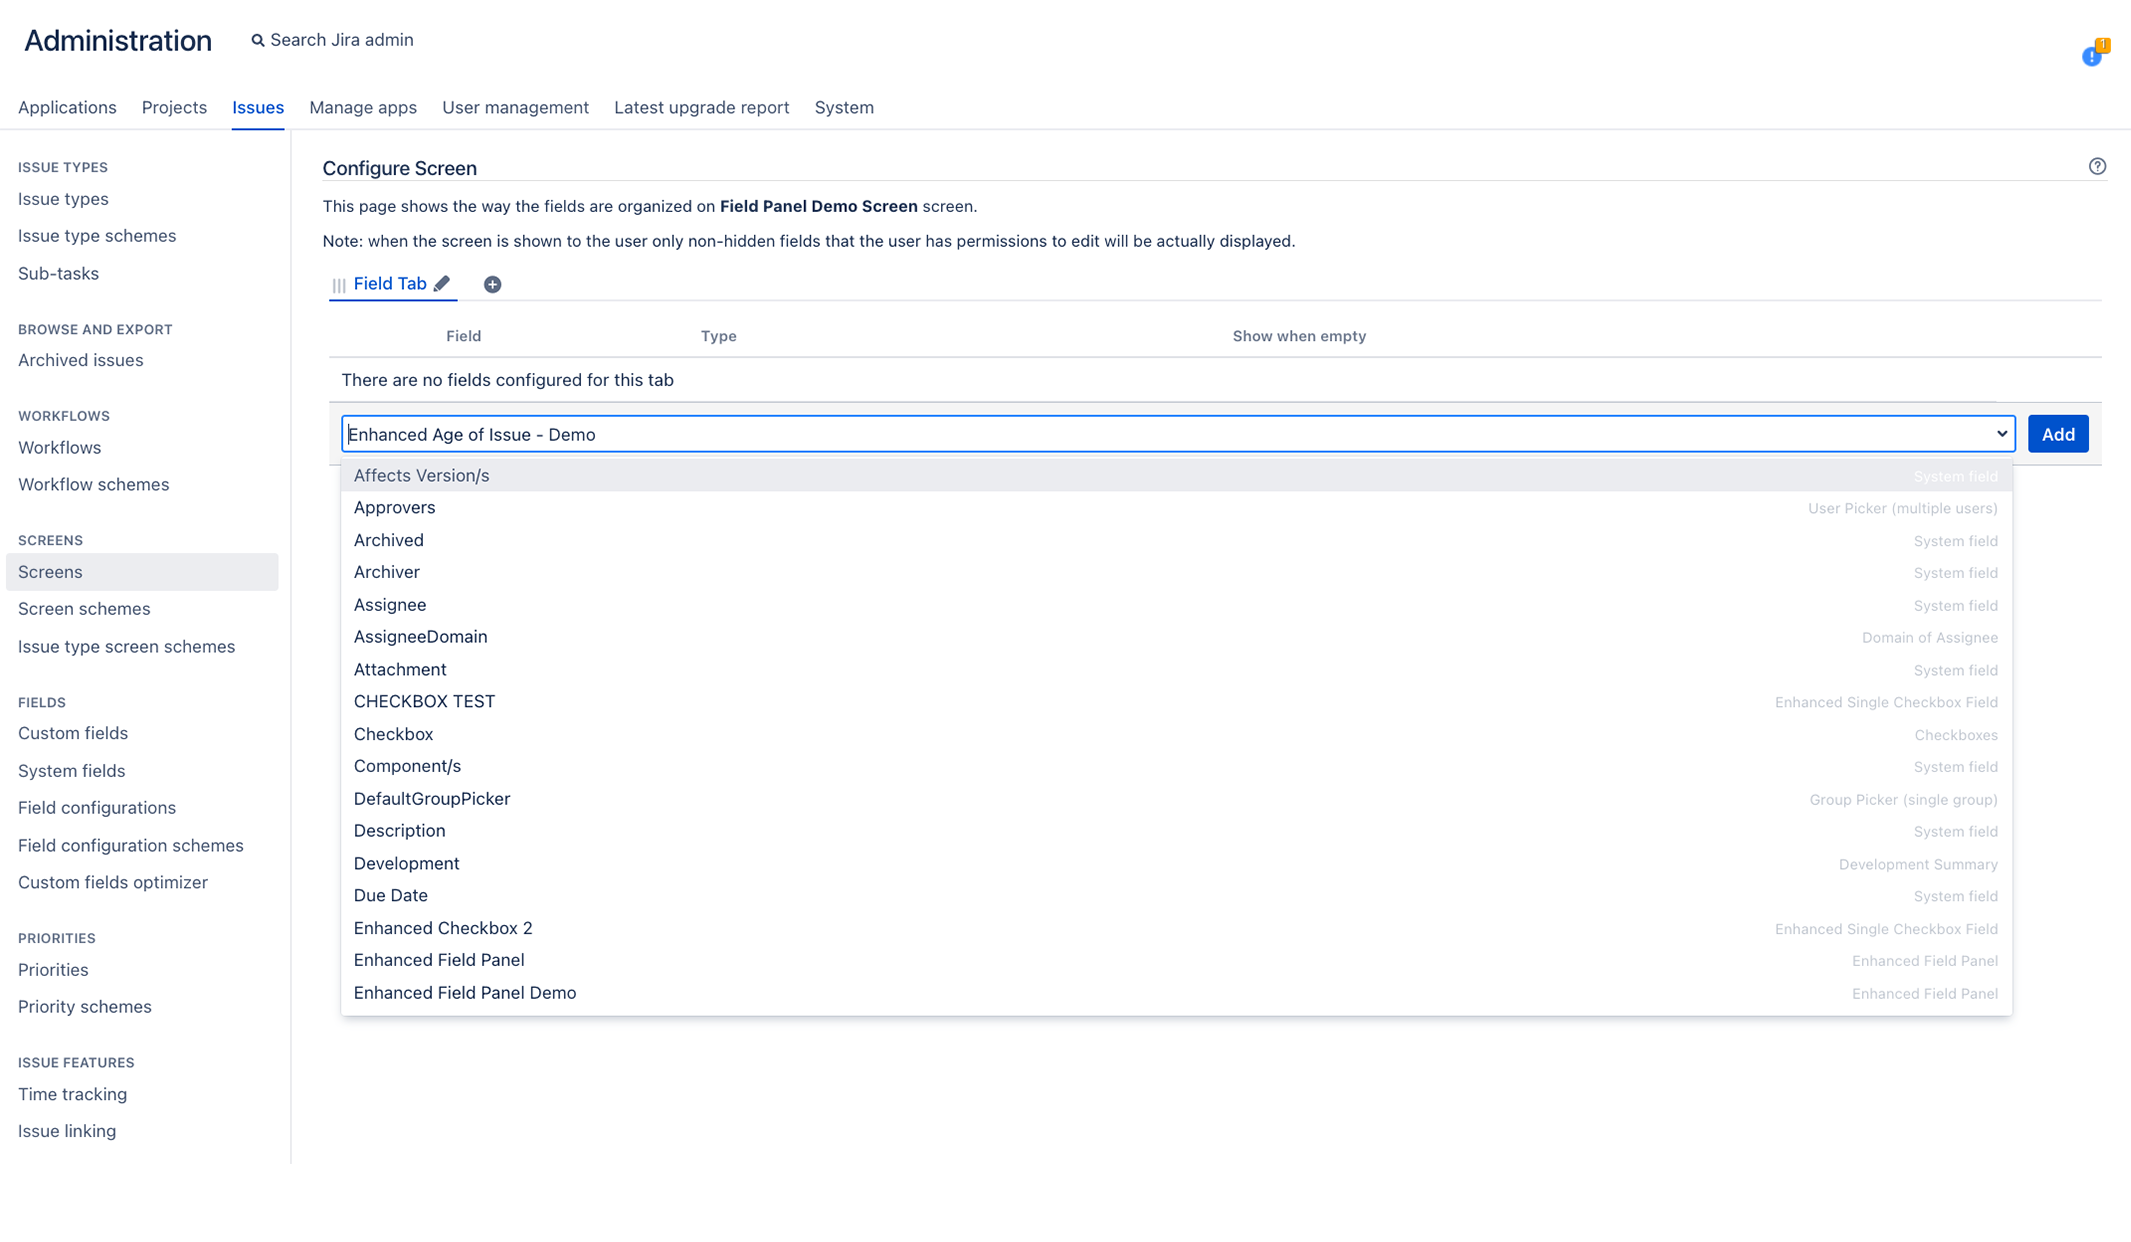
Add desired fields to screen