Recycle Bin for Jira (Cloud)
Within native Jira cloud instances, work items are typically deleted by removing them from the database. Retrieving deleted items inside a cloud instance is only possible by restoring from a backup or manual recreation of every single item.
Recycle Bin for Jira Cloud minimizes the hassle of managing deletion, recycling, and restoring of work items across your instance. Deleted items are collected and filed away out of view in a designated location. This keeps project spaces clean while maintaining full traceability of data.
1. First Steps & Setup
Upon setup, an administrator must grant global and/or project-based permissions to use the app and view the relevant components. Proper configuration is essential for the app to work as intended.
1.1 Global Permissions
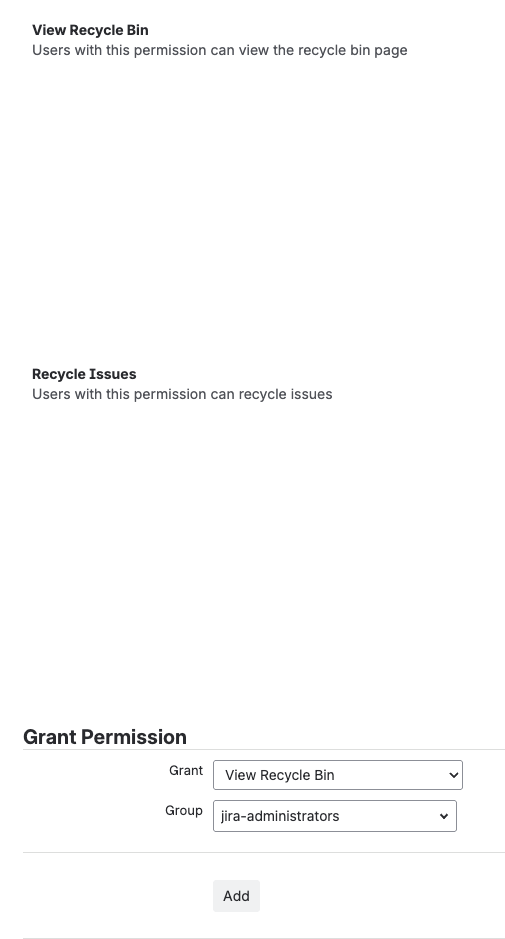
Configure your global permissions or permission schemes to account for the following:
Recycle Issues: Allows users to move items to the recycle bin.
View Recycle Bin: Allows users to access the recycle bin tab in projects.
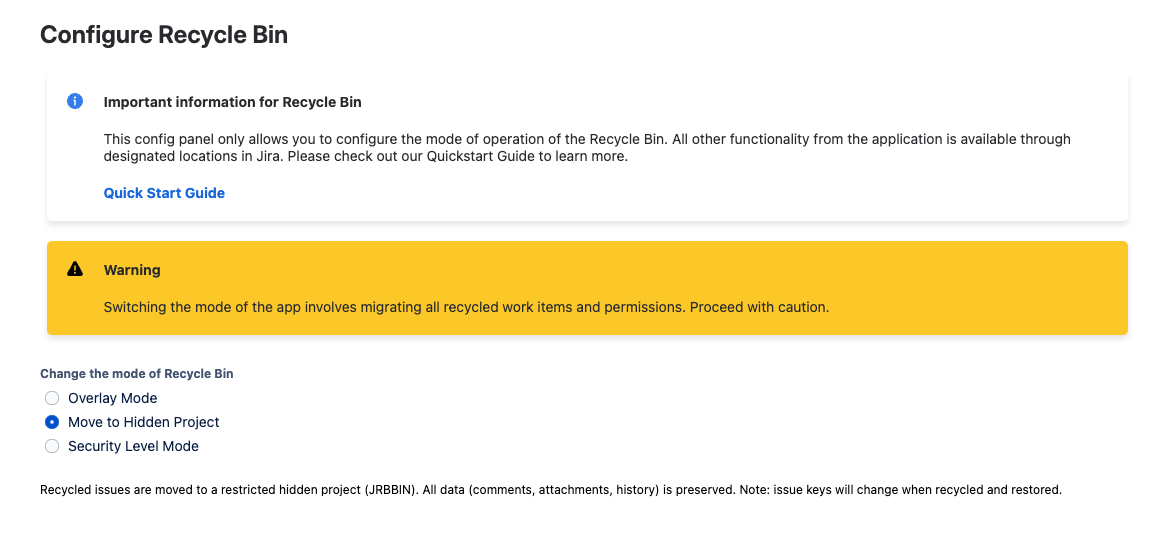
1.2 Recycle Bin Configuration / Modes
The app offers three flexible modes for handling recycled items. Choose the one that best fits your Jira plan and privacy requirements.
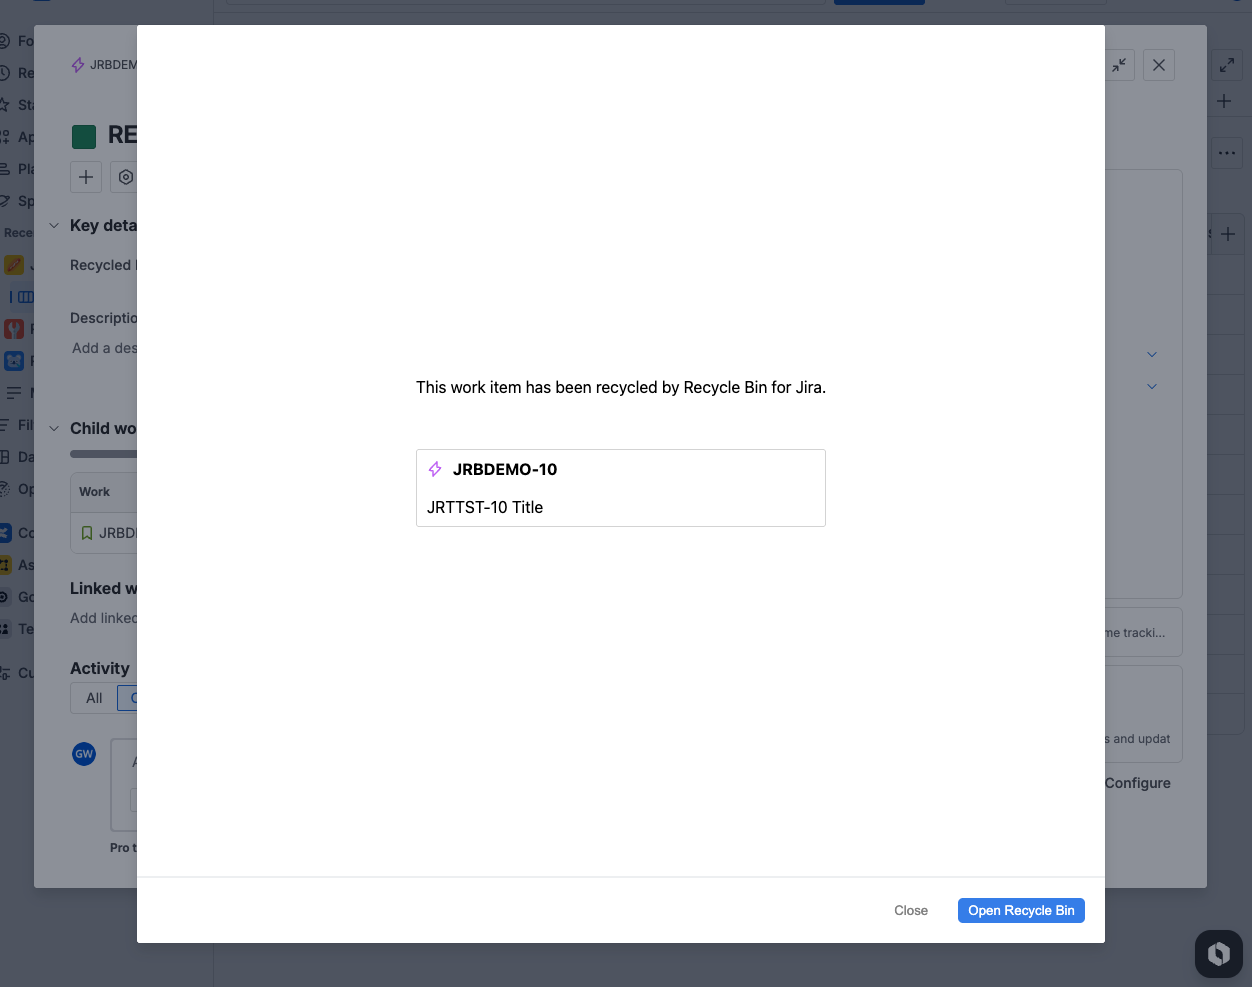
A. Overlay Mode (Free Instances)
Free instances do not support custom security levels. In this mode:
Recycling: The item persists in the project, but its summary is changed to prefix "RECYCLED".
Visibility: Accessing the item triggers an overlay indicating its recycled status.
Limitations: Items remain visible in standard list views and search results.
B. Security Level Mode (Paid/Premium Instances)
In Premium instances, the app leverages built-in issue security levels.
Recycling: The item is assigned a specific Security Level, hiding it from standard list views and direct access.
Visibility: The item is only visible inside the dedicated Recycle Bin view of the project.
C. Project Bin Mode (Recommended for All Instances)
This mode moves recycled issues out of their original project entirely.
Recycling: Issues are moved to a dedicated holding project called Recycle Bin (JRB) (Key:
JRBBIN).Traceability: Original project key, issue type, and other metadata are preserved in the "Recycled Meta" field.
Restoring: Issues are moved back to their original project and restored to its previous state.
Benefit: Keeps active projects 100% clean. Deleted items do not appear in search results or reports within the original project.
2. Advanced Configuration
Hiding the Recycle Bin Project (For Project Bin Mode)
If using Project Bin Mode, the dedicated Recycle Bin (JRB) project is a standard Jira Software project. By default, it may be visible to all logged-in users. To ensure deleted items are only visible to Administrators and the App, we recommend manually restricting access.
How to Restrict Access:
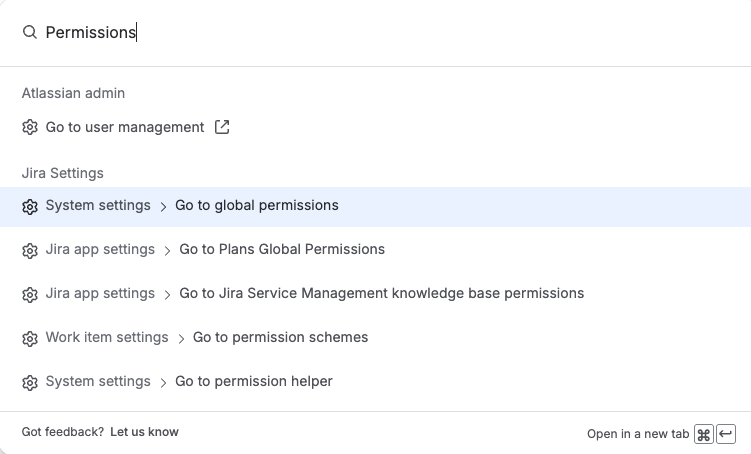
Log in as a Jira Administrator.
Navigate to Settings > Projects and select Recycle Bin (JRB).
Go to Project Settings > Permissions.
Select a restrictive Permission Scheme (e.g., "Admin Only") or click Actions > Edit Permissions to remove "Browse Projects" access for regular user groups (e.g.,
jira-software-users).

Important: The following roles must maintain full access for the app to function:
atlassian-addons-project-access (Project Role)
Administrators (Project Role)
3. Using Recycle Bin for Jira Cloud
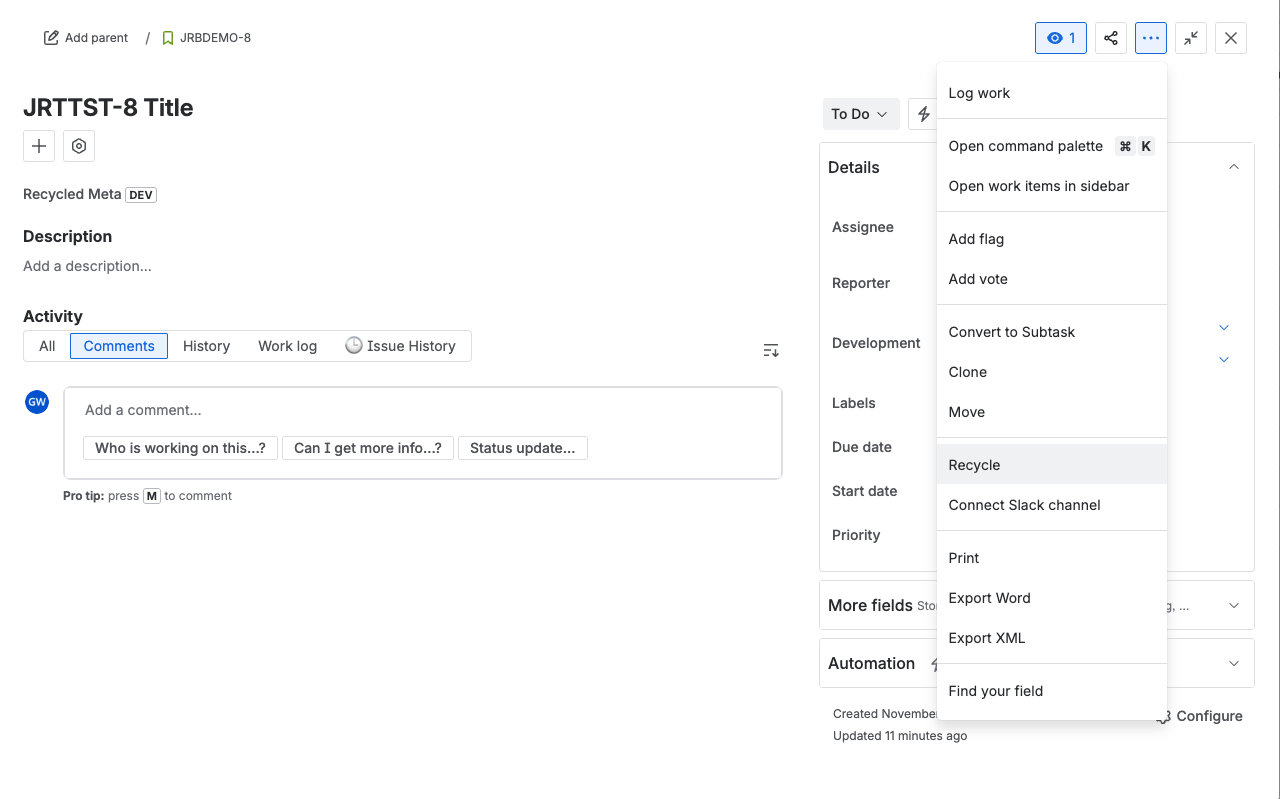
3.1 Recycling Work Items
In any Work Item’s detail view, click the three-dot menu button (“…”) to verify context actions.
Select Recycle from the dropdown menu.
The item will be processed according to your configured mode (hidden via Security Level, moved to the Recycle Bin Project, or marked with an Overlay).
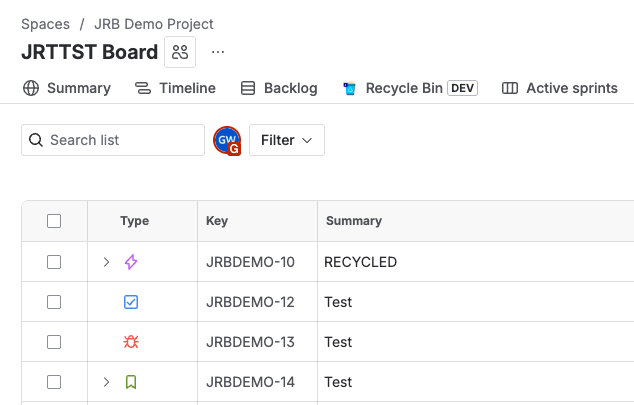
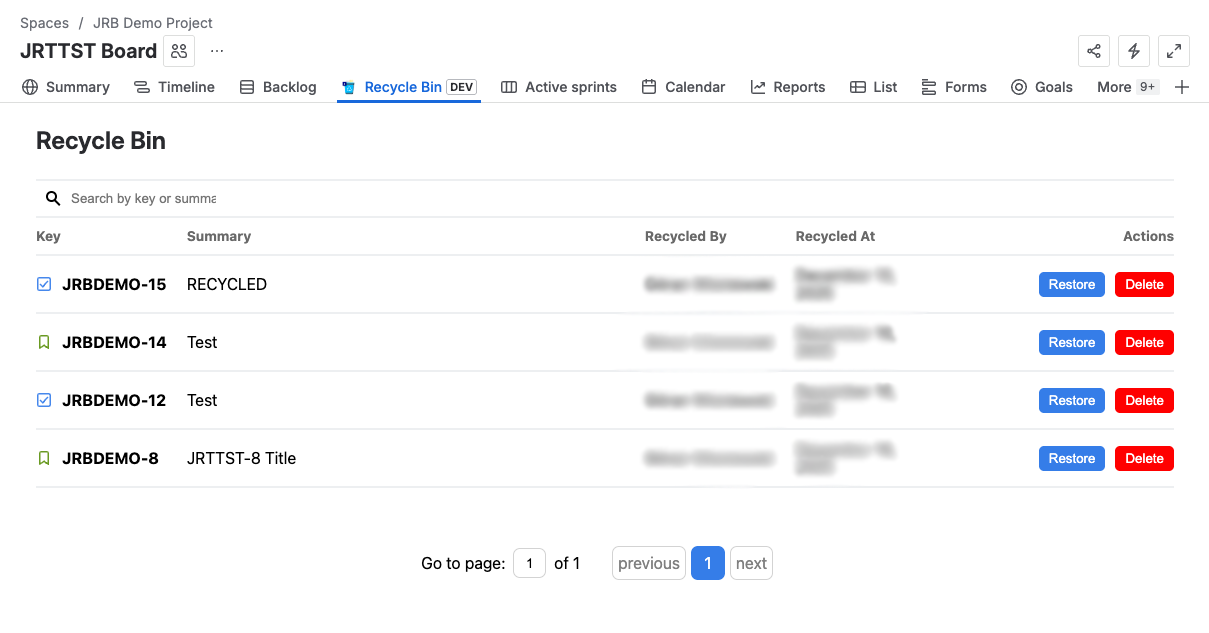
3.2 Viewing the Recycle Bin
To view all recycled issues for a specific project:
Navigate to the Project Space Overview.
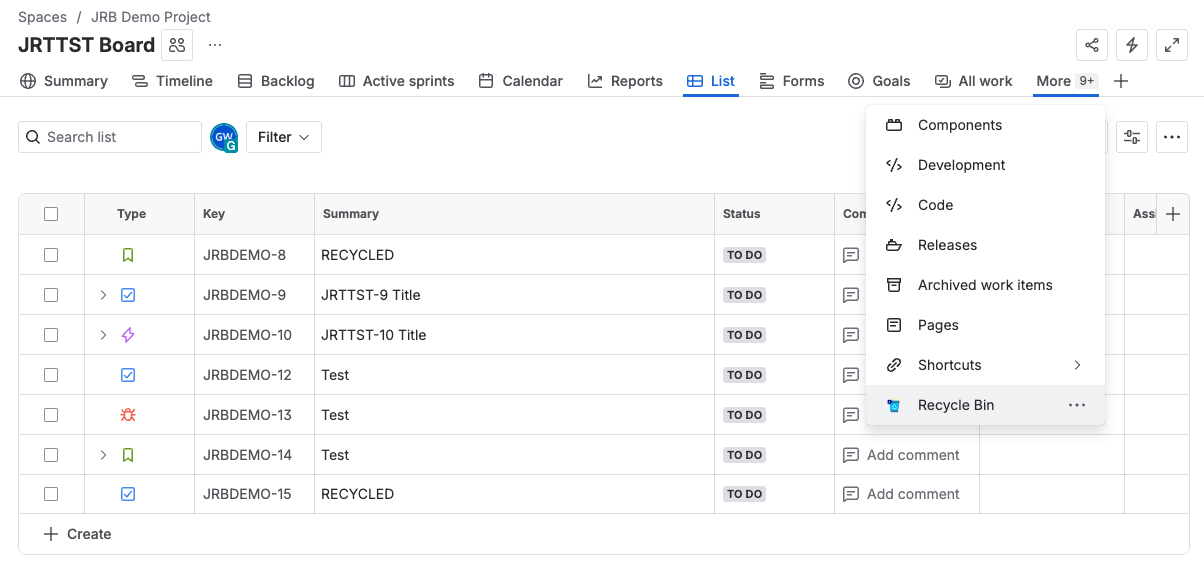
Click the Recycle Bin tab.
Note: This tab may reside under the “More” button on the far right. You can reposition it in the tab order by dragging it to a desired spot.
.png?inst-v=7cd0e1c8-77a2-42be-88de-97e9b56875f8)
3.3 Restoring or Deleting Work Items
From the Recycle Bin tab:
Restore: Click the restore icon to return the item to its active state in the project.
Delete: Click the delete icon to permanently remove the item from the instance.
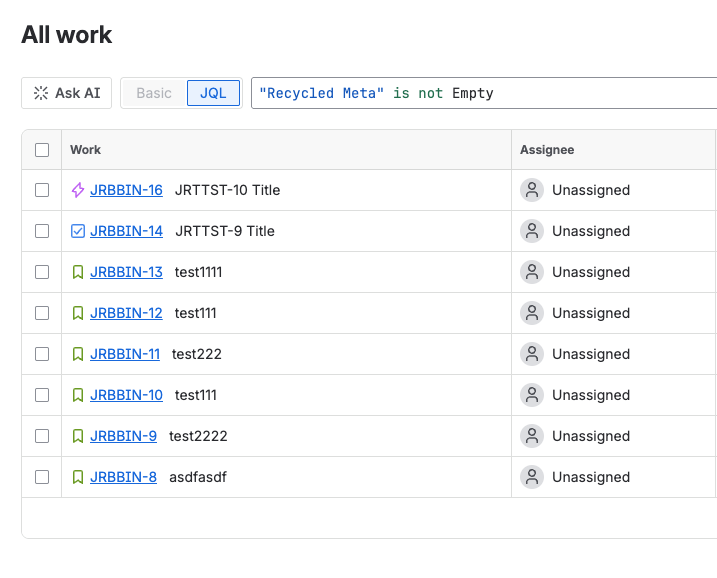
3.4 Recycled Meta Fields
The app adds a special “Recycled Meta” field to your work items. This fields tracks precise data about recycle actions. Admins and users can leverage this data to create distinct JQL filters (e.g., “Recycled Meta” is not empty) to query recycle bin usage and track the lifecycle of any work item.